|
Intro
Why build your own shed?
Well, I just don't like the ones you see for sale in shops, they are flimsy and expensive, my DIY shed is neither of these things.
Additionally it is exactly the size I want, and built to my spec.
...and I think it looks nice - if you like the cube look.
If you like the look of these pictures:


then read on...
....A little bit about this site
Clicking on any of the small images will open a larger version in a new browser window.
(try on some of the examples above)
I hope you like the site and enjoy reading about my little project.
The site is deliberately quite simple in its design, I think this makes it clean and easy to read. I try where possible
to avoid using any nasties like popups etc..
I didn't use anything other than good old notepad to design this site,
dreamweaver is great - but you don't need it...
Design
I wanted a shed for my garden, I also wanted a hot-tub and/or a ride on lawnmower.
Both of these are big, so I'll be needing a shed with wide doors.
I also wanted a square shed, most sheds in the DIY shops are rectangular.
I also wanted a shed with a reasonably high door, so I don't have to duck to get in - a reasonably high door also means a reasonably high ceiling.
I wanted a pavillion type roof because they look cool, and because flat roofs are generally boring and are a leak just waiting to happen.
Don't you just hate sheds that wobble or worse move in the wind? Mine doesn't wobble!
It doesn't wobble because the shed has four four inch corner posts that are integral to the shed, but are also sunk 2 feet into the ground at
all 4 corners. This makes for a very secure and stable shed.
It is this idea that really sets my shed design apart from other people's.
Build
The first step of building a shed is to choose the location, I used a few lengths of wood to mark it out full size and also to get an idea of level.
Once I had decided where the shed was going I spent a few minutes viewing the location from various parts of the house and garden to make sure I was happy with it.
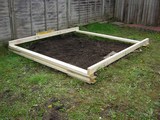
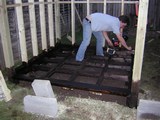
Once I was happy with the location, I cleared the area of grass and weeds, gave it a good dose of weedkiller so they don't come back and then dug the holes for the corner posts, concreted them in and then cracked on with the studwork and floor supports.
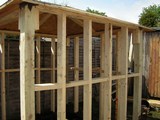
As always you need to be as accurate as you can be, I was planning on using 3mm ply to line the sides, so I spaced the posts out so they were exactly one sheet of plywood apart (which is 8 feet)
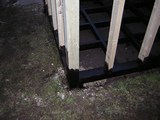
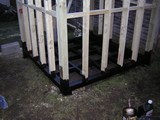
You can see that the four inch square fence post is well concreted into the ground, but also well fixed to both the floor and walls, this really does make for a nice strong join - and ultimately a strong shed. As some of this wood will be in contact with the earth, I gave it a good soak in wood preservative to help it last - It's already tanalised, but I reckon a bit more preservative can't hurt!!
The actual floor supports float above the ground slightly, by about 3 inches, I thought this would keep the wood and the floor nice and dry, before covering the floor joists with OSB I will pour in clean gravel to fill the gap between the floor and the ground to add extra strength.
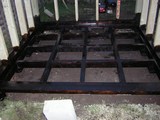
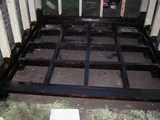
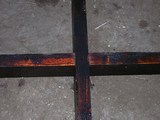
The floor joists join each other where they cross with a halving joint, here is a closeup of one of the joints.
Again, once it was all in place I gave the timbers another coat of preservative - better safe than sorry.
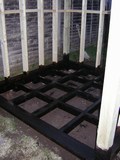
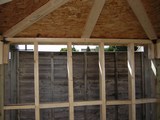
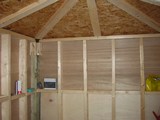
The walls are just stardard 2x4 timber on 16inch centres with noggins half way up. Pretty standard studwork really, here are some pictures
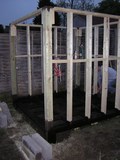
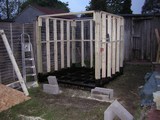
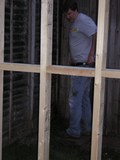
The strength and stability of this shed really does come from the way the corner posts form an integral part of the shed, the picture below shows how the posts form part of the wall.
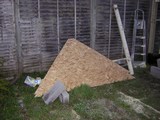
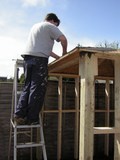
The roof is made of 18mm OSB board cut into 4 triangles to make a pointy pavillion roof. Calculating the triange sizes is fairly complicated and calculating the angle of the edge cuts is even more so. So I checked my calcs with a carboard scale model as 4 full sheets of OSB is a lot to throw away if you make a mistake!!
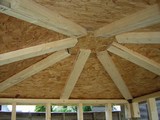
Like the rest of the shed, I wanted the roof to be strong, so I've reinforced all the joints and long expanses with extra timber.
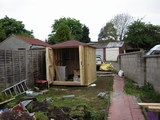
The shed is finished in featheredge boards, but I was a little concerned as to how weatherproof they would be, I also wanted the shed to be really sturdy so I actually clad the whole shed in sheets of 3mm plywood first. This also has an added bonus of giving a much nicer finish inside.
The pictures below show that the shed is lined with ply, then featheredged..
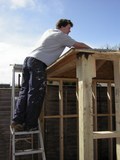
I had opted for a pavillion style roof, the picture below shows the completed walls and the wall plate in place ready to take the roof.
Rather than a fairly boring felt roof, I decided to use felt shingles which look a bit more attractive.

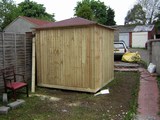
Here are a few shots of the completed shed, the rest of the garden is still a bit of a state at this point

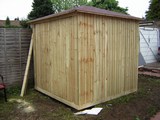
A shot of the shed with the huge doors open, these really do make getting stuff in and out very easy
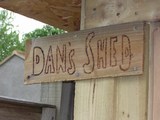
My good lady wife made me a nice sign for the shed, I think it finishes it off nicely
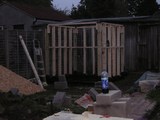
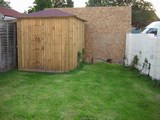
Here is the shed shortly after it was finished, and once the new turf had been laid. (The temporary OSB wall behind is just to close off the garden, this is now replaced with a garage)
There is a small electrical installation to my shed, nothing major just a short run of 6mm^2 from the RCD side of the garage consumer unit, it powers my compressor and a small ceiling light - I just used a simple 2 gang consumer unit.
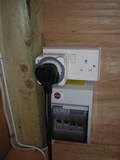
Additionally it is tied into the garage alarm system (which is tied into the house system)
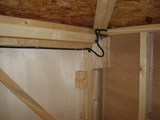
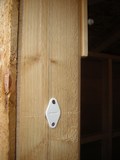
Both of the doors can be opened, so I simply put a reed switch on one and the corresponding magnet on the other. A bit of flexy conduit protects the cable where it is clipped to the door.

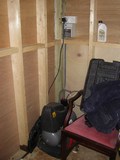
In Use
The shed has had quite a bit of time to settle in now. I actually completed it over 3 years ago, and it's had regular use over that time (and resisted some pretty foul weather)
Conclusion
Well, I hope you've enjoyed what I've done, I'm really pleased with my shed - so much so that I actually went on to build a large garage along similar lines.
Good luck if you decide to do something similar, my shed cost me about �300, I don't think you'll find a decent shed for that little money in the shops.
All the best,
-Dan
Comments
If you enjoyed reading about my project, and would like to leave a comment, please do!
I will post any interesting ones below.
COMMENTS:
---------------------------------------------------------------------------
A Partridge, Le House
Lovely Stuff!
Posted: 11:17 13/05/2008
---------------------------------------------------------------------------
KathyG, Wiltshire UK
Great description a very strong shed. ENJOY...
We are about to make a 3sided shed out of 2nd hand telegraph poles.
Strong or what!!
Posted: 11:27 15/05/2008
---------------------------------------------------------------------------
Uncle wilco
A great shed build and great instructions for the sheddie.
Maybe you can share it with us on Readers Sheds
Posted: 15:57 15/05/2008
---------------------------------------------------------------------------
Tani P.
Totally rockin shed!!
Way better than pre-fabbed ones, and infinitely better than
those horrid plastic rectangles! Well done.
Posted: 21:11 16/05/2008
---------------------------------------------------------------------------
Ben Doan
Very nice job. I like the floor and pavillion roof,
and you are right.
A nice, pre-built shed like this can be very expensive.
I must be honest - that adorable little sign is the best part.
Posted: 06:17 18/05/2008
---------------------------------------------------------------------------
Dr Pepper
You should be proud of your shed.
I like to know if it is possible to built a two floor shed?
Posted: 19:17 18/05/2008
---------------------------------------------------------------------------
Michael
Nice work!
Posted: 10:27 20/05/2008
------------------------------------------------------------------------------------------------
|